
Tennis Forehand Transformation – How To Improve Your Forehand Alone
Tennis Forehand Transformation How To Improve Your Forehand Alone
The tennis forehand is very complex and there are many different elements that you have to master in order to build a reliable forehand weapon. Often you may not have access to a coach, a good training partner, a tennis practice wall, or a tennis ball machine, so how can you improve your tennis forehand alone? In this free tennis lesson, Coach Simon Konov of Top Tennis Training will show you five ways you can transform your tennis forehand alone. Inside the lesson, we’ll cover the ideal contact point and how to find it, the forehand lag phase and how to master it, the perfect power position for your forehand, the movement to and from the shot, and how to improve your accuracy and direction on your forehand.
All of these 5 drills can be done alone, so no more excuses!
Step One
The perfect contact point on your tennis forehand. The ideal contact point will change depending on whether you use an extended arm forehand or a bent elbow forehand. Either way, you’ll want to make contact out in front of your body. With the extended forehand, you’ll be able to make contact further in front of your body, since the arm is much more extended.
Drill one: Start off with your racket around the contact zone and drop feed a ball, this can bounce or you can hit it in the air, like a drive volley. The main focus will be on brushing up the ball, if you imagine the ball as a flat clock face, focus on hitting up the ball from 6-12 o’clock if you’re hitting down the line or 5-11 o’clock if you are hitting crosscourt.
Finish with the tip of the tennis racket pointing up to the sky, this will help you build a low to high swing path during the strike zone, vital for hitting topspin and getting good net clearance.
Step Two
How to master forehand lag. Prior to contact, you’ll want the racket to lag behind the grip and hand. This action happens naturally if you’re relaxed and have built good technique but to really engrain it, you can also isolate the forehand lag and master the stroke from there.
Drill Two: Start off with your racket head in the lag position, you can play around with the angle of the strings here, the more topspin you want, the more you’ll close the strings to the ground. Drop feed yourself a ball and finish the forehand either over your non-hitting shoulder or across your chest.
Step Three
The perfect forehand power position. When you study the best players in the world, Roger Federer, Rafael Nadal, Novak Djokovic and many others, you’ll see that many of them reach a very similar power position. Try to focus on having your racket head higher than the grip level in this position, this will create leverage in your racket and hand, the non-hitting hand should be across your body, the upper body coiled and storing energy in the trunk muscles.
Drill Three: Start off in your perfect power position and drop feed yourself a ball and simply hit your forehand from that position. Once again, you can let the ball bounce or hit it in the air.
Step Four
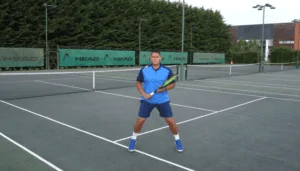
Tennis Forehand Movement. Getting into the right position to hit a good tennis forehand is half the battle. As soon as you land on your split step, and recognize you can hit your forehand, you’ll want to pivot around your right foot (left foot for left-handers). At the same time your foot pivots, you’ll start your unit turn with the body. You’ll then run to the ball in a side-on position with normal running steps whenever you can. From here you now hit the forehand and focus on recovery, back into a good position.
Drill Four: Start off in your normal ready position, do a split-step, and then pivot around your right foot and start running towards the https://www.viagrageneric.org/ sideline. Once you reach there, you should have reached the power position on your forehand, now you can drop feed yourself a ball to hit your forehand and then recover.
Step Five
Tennis forehand accuracy. The next step is now to aim your forehand. The two main targets when hitting your forehand will be crosscourt and down the line.
Drill Five: Feed yourself one forehand that you’ll aim to hit crosscourt, followed by one that you’ll aim down the line. Repeat this sequence. You can also mix up your feeds, some higher balls, some lower balls, some deeper and some shorter.
Video Timeline:
00:00 – Intro To The Forehand Lesson
00:48 – Overview of the Lesson
1:17 – Finding The Ideal Contact Point
3:27 – Drill One
4:46 – Racket Lag on the Forehand
6:32 – Drill Two
8:29 – Free Forehand Download
8:50 – The Perfect Forehand Power Position
10:44 – Drill Three
11:46 – Footwork and Movement To The Forehand
12:52 – Drill Four
13:38 – Forehand Accuracy